Welcome, Friends!

Welcome Friends Message Bunting

For a couple of years now, I’ve had this dollar store “Happy Birthday” sign up in my foyer. I think I originally put it up for Sym’s birthday and then forgot to take it down, and every time I remembered it, it would be someone else’s birthday.

Old Happy Birthday Sign

Yesterday I decided I’d finally have enough and it was time for a new sign. Originally I was planning on just making regular bunting and stencilling the message on to the pennants, but then I had a better idea: make my own message bunting!

I made this with stuff I had lying around the house, because I’m the kind of person who has this kind of stuff lying around the house, but if you don’t, none of these things were very expensive.

Welcome Friends Message Bunting Supplies

•self-healing cutting mat
•twine (mine is the plastic stuff I bought for my outdoor bunting but any kind of string would work)
•x-acto knife
•scissors
•tape
•full-sheet sticker paper (not divided into smaller labels)
•metallic origami paper

The first thing I had to do was make my letters! If you have a giant letter stencil you could use that, but I don’t (is that even a thing?) so I laid the letters out in Photoshop. At first I wanted to use a fancier font but I realized that would be too hard to cut out and wouldn’t sit right, so in the end I used Arial Rounded MT Bold at 450pt, which I think is perfect for this.

Welcome Friends Message Bunting Layout

I made the images 8×10 inches and 300dpi, and I could fit three letters on each one, except for the M and W, which are wider than other letters. If you do it this way remember to flip your images horizontally so your letters are backwards.

I printed my letter images onto the sticker paper…

Welcome Friends Message Bunting Construction

…and cut them out roughly.

Welcome Friends Message Bunting Construction

Next I had to decide what colour I wanted for each letter. Since I’m obsessed with rainbows, I went with rainbow colours. SHOCKING I KNOW.

Welcome Friends Message Bunting Construction

I peeled the backing off the sticker paper and stuck it to the back (white side) of the origami paper.

Welcome Friends Message Bunting Construction

I cut out the letters with scissors, except for the interior cut outs, which I did with my x-acto knife.

Welcome Friends Message Bunting Construction

And when you flip them over…

Welcome Friends Message Bunting Construction

Perfect, non-backwards metallic letters! Now, if you were tracing the letters with a stencil or free handing them you could theoretically draw them right onto the back of the origami paper, but the metallic origami paper is quite thin and tends to curl up and/or tear easily when it’s cut into narrow strips, so the sticker paper also adds much-needed thickness and strength.

Once all the letters were cut out, it was time to assemble the sign! I flipped the letters back over to the sticker side and laid them out with the words spelled backwards (otherwise the shiny side of the completed sign would have said SDNEIRF EMOCLEW).

Welcome Friends Message Bunting Construction

I didn’t cut the twine because I wasn’t sure how long I needed it to be. I taped the end of the twine to the counter, leaving about ten inches of twine on the far side of the tape for hanging the sign, unspooled it across the counter, pulled it taut and taped it down at the spool end as well. Then I slid my cutting mat under the twine, so I could lay the letters out neatly, at the same height and evenly spaced.

Welcome Friends Message Bunting Construction

To attached the letters to the twine I just used scotch tape. SO EASY, right? If I’d been thinking I would have saved the scarps from the sticker paper and used that, but tape worked fine. My tape was a little wider than I needed it so I just trimmed any overhanging excess with my x-acto knife (another reason why using the cutting mat here was a good idea!). After I attached each group of letters I would slide the cutting mat over to the next section- I could do about three or four letters at a time. When I had attached all the letters I cut the twine, again leaving about 10 inches for hanging.

Welcome Friends Message Bunting Construction

All done! I made two separate signs for “WELCOME” and “FRIENDS” because I wasn’t sure if it would hang nicely with a stretch of empty twine in the middle.

Welcome Friends Message Bunting

To hang the signs I tied the ends of the twine to some thumb tacks, trimmed the excess and stuck them into the ceiling, but you could also tie the ends of the twine into loops and hang them on pins or tacks or whatever.

Welcome Friends Message Bunting

I love this project- it turned out WAY better than I thought it would. I was worried the letters wouldn’t hang right (especially the L) but it’s totally perfect, and exactly how I pictured it!

Manicure Monday

Manicure Monday Header

I still have my rainbow nails, but on Saturday I repainted the blues. As much as I love Essie’s Turquoise & Caicos, it’s TOO turquoise to be the blue in the rainbow, at least on the blue/purple thumbnail- it looked way to green. The new blue is Sally Hansen Xtreme Wear on Blue Me away! and I think it’s much more suitable.

Rainbow Nails Refresh

I did paint my toenails though! idk if I’m going to leave this picture up, my feet aren’t cute :/ But I love the colour so I’m compelled to share.

Feet Aren't Cute

Sally Hansen Xtreme Wear in Lacey Lilac + Sally Hansen Complete Salon Manicure in Hidden Treasure

Weekend Complaints

Complaint Number One: It’s raining.

Complaint Number Two: Twelve tacos aren’t enough for three kids and two adults, and when you don’t get to have as many tacos as you want because you let the kids eat them all you end up craving them forever.

Complaint Number Three: I am in terrible shape (this is unrelated to tacos). I went to the gym this afternoon and almost barfed after twenty minutes. Awesome. Also, they changed the set up at my gym and I don’t like it anymore.

Complaint Number Four: These strawberries were really mediocre.

Mediocre Strawberries

I wish food wasn’t grown on a quantity over quality basis, like these were huge, but they barely tasted like anything. Except sourness.

Complaint Number Five: I’m having serious woes with some prints I ordered from Apple through iPhoto. Remember this picture of Sym? Well, after her dad and I bought the digital copy I ordered an 8×10 and two 5x7s for us. I’ve ordered prints through iPhoto before and never had a problem, but this time there was a HUGE flaw on ALL the prints that ruined them. Try to spot it:

RUINED PHOTO >:|

this is a photograph of the print I received from Apple
Can you see what it is? Yeah, the weird blue-black blobs at the corners of her eyes. WHAT THE HELL IS THAT??? After I saw it I went back and looked at the picture on my computer to see if maybe there was something wrong with it.

screen-shot-2011-04-10-at-4-16-09-pm

this is a screencap of the picture in iPhoto, zoomed to the max
NOPE. No blobs. In fact, barely even any shadows around her eyes, and what shadows there ARE, certainly aren’t NAVY BLUE. So I contacted Apple with my problem, and today I got this back:

Thank you for contacting Apple Photo Services Customer Support. My name is [redacted] and I understand that your prints arrived with blue spots of the girl’s right eye. I see how eager you are to get this corrected, I will do my best to look into this for you today.

I looked at the file you sent us and I see that the spots is in the file itself. If we process your order again, it will turn out the same way. Unfortunately, we are unable to modify files after we receive them. Please adjust your file and resubmit it at your convenience.

Okay first of all, “blue spots of the girl’s right eye”? What? There are blue spots to the right of both of her eyes, not blue spot of her right eye. Next, “I see that the spots is in the file itself”? THE SPOTS IS IN? What does that even mean? And finally, “Please adjust your file and resubmit it.” Now, WHY would I want to do that? There are no spots on the file on my computer, so it must be something to do with the submission system. I even printed it out myself (on regular cardstock, since I don’t have any photo paper WHICH IS WHY I ORDERED PRINTS IN THE FIRST PLACE) to confirm and see:

Inexplicably Non-Ruined Photo

this is a photograph of the print I made
NO SPOTS. Ugh this is so annoying.They’re refunding me the cost of the prints and shipping, but I JUST WANTED MY DANG PICTURE OF MY DANG KID SO I COULD FRAME IT AND PUT IT ON MY DANG WALL. I already bought a frame and everything! Now I’ll have to go buy photo paper ($$) and print them myself, using up all my stupid printer ink in the process ($$$$). I AM DISAPPOINT >:(

It’ll Get You Drunk

It would be nice if I could have a fancy cocktail as a weekly feature, but usually by the time Friday night rolls around it’s all I can manage to crack open a can of beer.

St. Germain 75

I had one of these in Memphis (I swear I will shut up about Memphis soon) and it was so good I had to recreate it at home.

St. Germain 75

combine
•2 oz Hendrick’s gin
•1 oz St. Germain
•1/4 oz simple syrup
•3/4 oz lemon juice
shake with ice, strain into a glass and top with champagne (or other sparkling wine)

St. Germain 75

I love it, Taylor…

St. Germain 75

… maybe not so much. Okay he says it tastes good, but boozy. BOOZY. Basically he can’t handle his liquor.

Manicure Monday Friday

Manicure Monday Header

…of course as soon as I decide to post my nails on Mondays, they are so fun I can’t wait!

My Rainbow Nails

Why should Sym have all the rainbow fun?

My Rainbow Nails Right Hand
My Rainbow Nails Left Hand

My are painted the opposite way as Symphony’s, and I did two colours on my thumbnails so I could have pink in my rainbow.

My Rainbow Nails Right Thumb
My Rainbow Nails Left Thumb

I definitely need a better technique for doing this. I painted them all over with the first colour (pink and blue, respectively), the put tape over one half to make a clean line and put the second colour (orange and purple) on the other half. However, maybe I just didn’t let them dry long enough but the tape totally messed up the polish underneath, so I had to do about a jillion coats to smooth them out. I used scotch tape on one and painter’s tape on the other and neither kind worked well.

Polish Rainbow- Six Colours

Essie in Mod Square; Covergirl Boundless Color in Candy Corn; Sally Hansen Xtreme Wear in Mellow Yellow; Sally Hansen Complete Salon Manicure in Grass Slipper; Essie in Turquoise & Caicos; Sally Hansen Xtreme Wear in Lacey Lilac

Memphis Vacation: The Long Way Home

Saturday, April 2nd
When I was making these posts, I actually made drafts of them all with just a quick note about what we did that day, for for this post all I wrote was “travel day of unending travel.” SO TRUE.

Taylor and I woke up early on Saturday morning and finished packing our bags. Zach and Amy were supposed to drive us to the airport but SOMEONE cough*Amy*cough is too good to get out of bed before seven on a Saturday. FINE, AMY, WHATEVER.

Zach dropped us off at Memphis International Airport in plenty of time to make our flight, which was great except as it turned out, our flight was late. half an hour late, which would be okay except we had another flight to catch and only one hour between then. Plus the airport didn’t have free wi-fi like WHAT. I felt like I was living in the dark ages. Anyway our flight was a big knuckle biter as there were quite a few people with connecting flights and short layovers.

When we landed at Minneapolis-St. Paul we all rushed off the plane in a tizz, and as it turned out Taylor and I were really lucky, because our next flight was only two gates over. CRISIS AVERTED. It was already boarding so I had just enough time to pee and then it was adios, Twin Cities! I quite literally barely knew you.

All we saw of Minneapolis-St Paul

The flight to Seattle was uneventful, except for the part when I was putting something (my kindle? I forget) in my bag, which was under the seat in front, and we hit some turbulence and I snagged my nail in the mesh seatback pocket, causing it to tear and start bleeding everywhere. AWESOME. I was brave and just sucked it up though. I mean literally. Gross, but what else am I going to do with a bleeding finger and 36,000 feet?

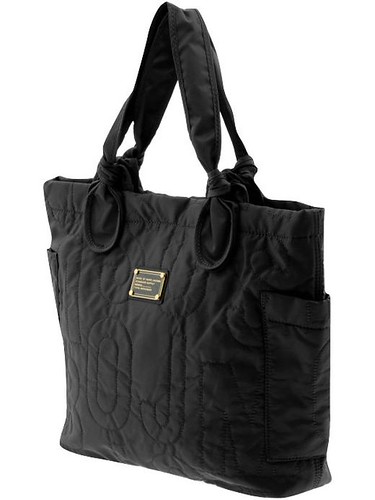
We landed in Seattle right on time and in a typically Pacific Northwestern rainstorm, and a some nerve wracking wait at the luggage carousel (we’d had to check our bags in Memphis and were anxious that they might have been left behind in MSP because of our late arrival there) we headed downtown. I’d bought tickets on the 6:50pm train back to Vancouver, and it was around 2, 2:30 by this time, so we figured we’d just get some lunch and go shopping or something. We went to go drop our bags at the train station first, and guess what? The train was cancelled because of a MUDSLIDE on the tracks! Insane, right? Anyway, Amtrak had arranged for busses to take us instead, so we stuck to our original lunch & shopping plan. After way too much food at the Cheesecake Factory (WHY IS IT ALWAYS SO MUCH FOOD???) we went to Nordstrom and I spoiled myself with a new bag.

mbmjprettynylontote

Now, I ACTUALLY bought a bag BEFORE the trip, becaus eI wanted something medium big with a zipper for the plane. I found one I thought was perfect at Plenty, but as it turned out it was a piece of garbage and even though I only used it for a week, the seams around the zippers all came undone and the zipper tab on the outside pocket came right off! LAME. Unfortunately I think I tossed the receipt already but I’m still going to take it back to the store to show them what junk it is! Lesson learned: don’t buy .co-lab bags, they totally suck.

Anyway. At around 5:30 we headed back to the train station to retrieve our bags and get on the bus. Let me tell you, I was NOT looking forward to a long bus trip- it was the whole reason I booked train tickets instead! But I like to look on the bright side, and the bright side of the bus was that it was actually faster than the train, even with a short wait at the border*. Less comfortable and no wi-fi, but we pulled into the station in Vancouver at around 10:30pm.

Now, because the bus arrived earlier than the scheduled train would have, there were no cabs, so I said FORGET THIS and set out to catch the Skytrain. After we got downtown and wheeled our suitcases through the Saturday night crowds (I definitely plowed mine into some ankles) we got home to some very excited dogs and one overtired kid. Once our stalwart housesitters (Sym’s dad & stepmom) went home, I put Sym to bed, we walked Georgie and Kichou and then we basically PASSED OUT. By that point it was getting close to midnight and we’d been up since 4 am PST. To be quite honest, I’m not sure if I would do all that travel in one day again- on the way down we went to Seattle the night before our flights and spread the travelling over two days, which was much nicer.

Anyway, that was my trip to Memphis! It was super fun and amazing and I’m happy I finally got to meet my oldest internet friend irl 🙂

*When you cross the border on a bus, you and all your bags and belongings have to get off the bus and go talk to a border agent in the office. They always ask you the same kinds of questions at the border, and I thought I was all prepared, except my border agent asked why we had friends in Memphis, so I had to say we were visiting internet friends. I’m not ashamed of meeting people on the internet, but it was still kind of embarrassing to have my internet friendship dissected by a border guard!

Manicure Monday Thursday: Symmie Edition

I painted Sym’s nails this afternoon, they are very sloppy here but I wanted to take pictures right away because I figured she would chip them quickly. It was also hard to keep the polish on her nails because she’s chewed them down to little nubs She’s pretty sensitive/embarrassed about them and some of her friends have been teasing her, but I’m hoping if I keeping painting them she’ll stop.

Symmie Rainbow Nails

If she had her way she would have done them green-yellow-purple-blue-orange, but I’m a rainbow order purist.

Polish Rainbow

l-r: Sally Hansen Xtreme Wear in Lacey Lilac; Essie in Turquoise & Caicos; Sally Hansen Complete Salon Manicure in Grass Slipper; Sally Hansen Xtreme Wear in Mellow Yellow; Covergirl Boundless Color in Candy Corn
I thought it would be fun to do them in a pastel rainbow, sort of spring/Easter-like, but the whole time I had to listen to her complaining about how it wasn’t a REAL rainbow because there wasn’t any red. Ugh, really? When I was a kid my mom NEVER painted my nails. I also had to walk ten miles to school. In the snow. Uphill both ways!

Sym in Vintage

Amy sent this vintage Izod Lacoste sweater home to me for Sym, I wasn’t sure if it would fit but it’s great! Thanks, Amy 🙂 Sym is even kind of channeling you in this pic, haha.

Symmie in Izod

What I’ve Been Eating

Yesterday was the first time in a long time (like, since well before my trip) that I made anything really good to eat.

Panko Chicken, Carmelized Carrots, Roasted Broccoli

dinner: panko crusted chicken, carmelized carrots and roasted brocolli

Havarti, Cucumber & Sprouts

lunch: havarti, cucumber and sprouts on sesame bread